The combination of touchscreen and NFC module is quite useful for many situations. For example, you may build a simple signup system or an advanced billing system which is a little more complex.
Here we’ll use Waveshare 3.5″ Touchscreen and ITEAD PN532 NFC Module. Both the prices of the two components are pretty fare and they can basically meet most of our requirements.
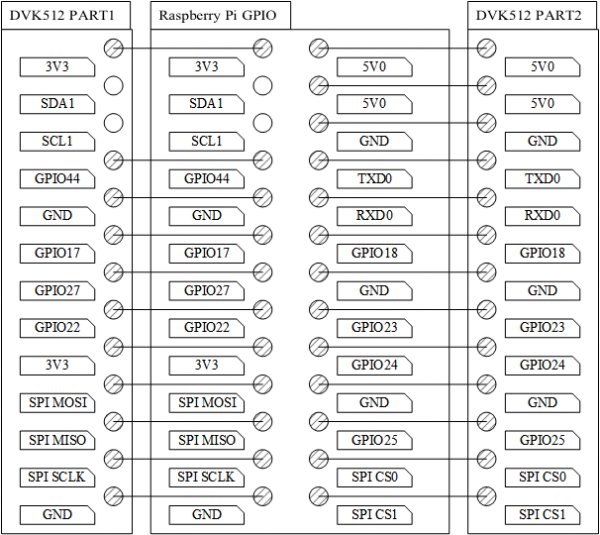
The Waveshare touchscreen comes with a DVK512 chip which doesn’t support SPI master-slave architecture. This means we cannot use the PN532 with SPI at the same time. Fortunately, ITEAD PN532 provides various interfaces including SPI, I2C and UART. I’ll show you how to make PN532 over I2C work with Waveshare touchscreen together.
Firstly, you should connect Waveshare touchscreen to Raspberry Pi and ensure that it works properly. Detailed introductions can be found in their wiki and you may simply download and flash the Raspbian image provided by them. This is quite easy.

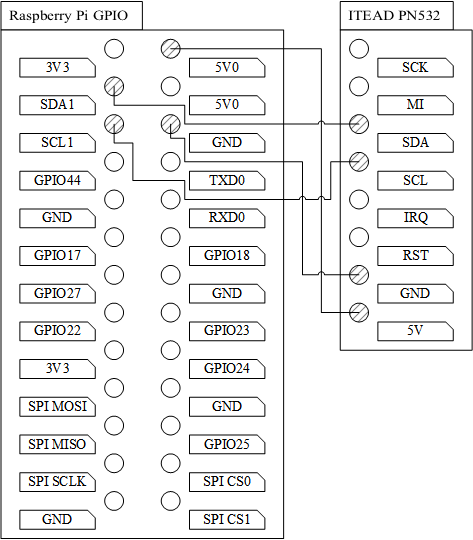
Secondly, get your PN532, set jumper 0 to H and jumper 1 to L. This makes your PN532 run with I2C. After that, connect PN532 to Raspberry Pi as the following figure shows.

Finally, install libnfc and finish the configurations. The new Raspberry Pi 2 will be a little different, pay attention to that.
allow_autoscan = true
allow_intrusive_scan = false
log_level = 1
device.name = "Itead_PN532_I2C"
# For Raspberry Pi 2, use i2c-1
device.connstring = "pn532_i2c:/dev/i2c-0"
Now all the components should work properly. Congratulations 🙂
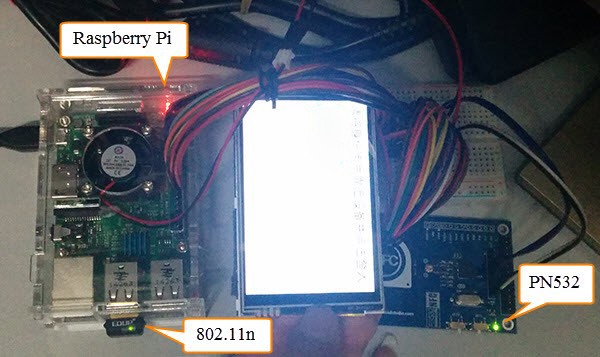
(Here’s my Pi)


bonjour, je suis un projet sur une raspberry pi B+ un une carte NFC itead pn532. je ne suis pas tres doué. je code en python mais je n’arrive pas mettre en fonctionement ma carte. Pouvez vous m’aider s’il vou plait.
Merci beaucoup
( depuis Paris)
(I don’t speak French…) Before implementing any functions in Python, I think you should have tried the test commands provided by libnfc itself. You can take advantage of those commands to check if you have configured the driver correctly.